I'm sure at some point I will get a little slow stitching in on my newest project - some sage and forest greens tumblers with a little bit of creams thrown in. I have 320 tumblers cut for hand stitching... which should make a nice size throw when done. The tumblers are just shy of a 5 inch square.
Linking up with the other slow stitchers today.
It has been a busy couple of days. Friday the kids and I had a travel day and flew up to Vermont via NY.... and took the ferry over to Vermont.
The kids were a wee bit wound up when we arrived at my parents around 8:30PM.... and it was a late night for everyone. Yesterday was my niece's high school graduation and we attended the party after with lots of family. She got her quilt and lots of visiting happened. I have another niece who flew in from Colorado as yesterday was also her fathers 50th birthday! Happy birthday David! I had a car to return (oops.... noticed they were only open until 1PM.... at noon! Thanks to my sister Terri for popping over and picking us up). We had a little time to kill so we took a drive through Hope Cemetery to look at the granite sculptures. Barre is the Granite Capitol of the world.... and there were some wonderful artists that created some awesome monuments.
Today.. is a party at my brothers to celebrate his birthday and his step daughters birthday next week. It was to be out at camp... but with rain and cold in the forecast we switched it yesterday. Both kids slept for 12 hours last night! They needed to catch up on their sleep after a busy couple of days!
Tomorrow a niece will take the kids hiking while I head into the actual office for some meetings in the afternoon. Looks like Tuesday the temps will change and we will move out to the camp. For now.. with all the parties it made sense (and was cool - temps in the 60's during the day and I am loving it compared to Florida weather!) to stay at the house for a few days.
Time to get dressed and drag the kids on a walk this morning before the rain drops start.
Sunday, June 24, 2018
Monday, June 18, 2018
Something new..... tumbler anyone?
I have a plan for my take with me projects when I travel later this week up to Vermont. I'll have the heart and nines quilt for hand quilting while up there but I also wanted to have another option.
I saw a tumbler quilt recently and decided that would be a good hand pieced project to take with me. I didn't want to purchase a ruler so I made my own template with a cardboard piece from inside a FQ. I measured in 3/4 of an inch from each side and drew a line to each corner and cut. I figured it will work on a nice 5 inch square to make a good size quilt fairly quickly. Of course... I had to test it out before cutting oodles of fabrics. I grabbed some purple and a printed purple leaf and got this little 'doll quilt'. I just need one more seam to put the two parts together. This is about 18x18 inches with just 20 tumblers. Hmmmm it might need one more row of 5. I'll have Emily test it on some stuffed animals and see what she thinks.
It worked! Now I really need to decide on what colors to pull to play with. I am leaning towards greens - the darker forest greens and maybe some dark creams or brown thrown in here and there. I know Bonnie Hunter had a sew along a few years ago with tumblers and I loved how the scrappy ones turn out.... but I think I'll keep mine to controlled colors ....this time!
I saw a tumbler quilt recently and decided that would be a good hand pieced project to take with me. I didn't want to purchase a ruler so I made my own template with a cardboard piece from inside a FQ. I measured in 3/4 of an inch from each side and drew a line to each corner and cut. I figured it will work on a nice 5 inch square to make a good size quilt fairly quickly. Of course... I had to test it out before cutting oodles of fabrics. I grabbed some purple and a printed purple leaf and got this little 'doll quilt'. I just need one more seam to put the two parts together. This is about 18x18 inches with just 20 tumblers. Hmmmm it might need one more row of 5. I'll have Emily test it on some stuffed animals and see what she thinks.
It worked! Now I really need to decide on what colors to pull to play with. I am leaning towards greens - the darker forest greens and maybe some dark creams or brown thrown in here and there. I know Bonnie Hunter had a sew along a few years ago with tumblers and I loved how the scrappy ones turn out.... but I think I'll keep mine to controlled colors ....this time!
Sunday, June 17, 2018
Sunday Slow Stitching..... and Fathers Day.
I started putting the dresden blocks together and you can find my tutorial on how I did it on Monday's blog post here. I will probably prep the 3 rows and get them sewn together today.... and maybe get a few stitches into the dark blue dresden block that is going to go in the bottom corner. I finally finished the blades and marked the cross hatching... then remembered I needed to outline the plate in blue! Aidan wants to sew on his quilt today too.
Linking up with Kathy at Slow Sunday Stitching. and Oh Scrap.
Wanting to wish my Dad a Happy Fathers Day. Can't wait to see you and Mom on Friday night.
Linking up with Kathy at Slow Sunday Stitching. and Oh Scrap.
Wanting to wish my Dad a Happy Fathers Day. Can't wait to see you and Mom on Friday night.
| Dad, Em and Aidan at camp 2017 |
![]() |
| Dad Feb 2018 at my house with Peanut. |
Saturday, June 16, 2018
Squared Away blocks....
I made a couple of the teal squared away blocks this week. Emily helped with the 3rd one... some seam ripper work is needed to fix a seam or two so I can finish the 3rd one.
Linking up with the RSC Challenge today before I head out to weed a bit in the front before it gets too hot... and then spend the afternoon at the roller skating rink with the girl scout troop for their requested skating party today.
Wishing my parents a belated 55th Wedding anniversary yesterday and my nephew a belated birthday - yesterday.
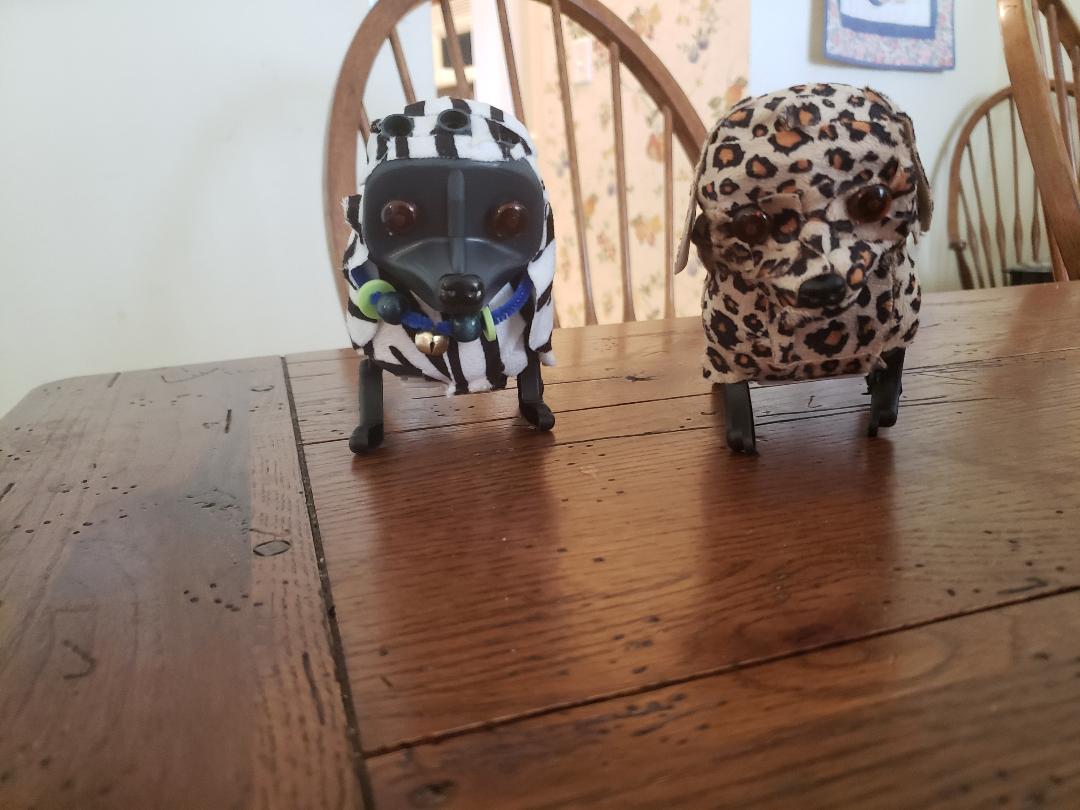
The kids finished their week at Camp Invention yesterday - and came home with their robot dogs, an octo bot that follows a dark line drawn on paper and a mini mansion they each crafted during the week. They had a great time again at camp- learning and having fun.
Linking up with the RSC Challenge today before I head out to weed a bit in the front before it gets too hot... and then spend the afternoon at the roller skating rink with the girl scout troop for their requested skating party today.
Wishing my parents a belated 55th Wedding anniversary yesterday and my nephew a belated birthday - yesterday.
The kids finished their week at Camp Invention yesterday - and came home with their robot dogs, an octo bot that follows a dark line drawn on paper and a mini mansion they each crafted during the week. They had a great time again at camp- learning and having fun.
Thursday, June 14, 2018
Dresden progress....
Progress..... I need to unstitch the pink/green.... I seem to have put the little strip of fabric on wrong!
Time to use the seam ripper and fix it...then add the block next to the purple. One row to go after that!
Linking to the RSC Challenge... since that is where I started these!
Wednesday, June 13, 2018
Finished Graduation Quilt!
The pattern is Spinning Pinwheels
I finished the binding on the graduation quilt on Sunday evening. Saturday Emily pretty much made the pillowcase - I just did the cutting and stitching 3 seams. She did the pinning and ironing and followed the youtube video that we used to make the girl scout pillowcase. She picked the fabrics too. I hear we need a purple ribbon to tie the pillowcase closed for gifting since that is the one color I did not get into the quilt for her.
A pretty light teal polka dot fabric on the back. Time to throw it into the washer and dry it. Then sign it once Emily gets home from Camp Invention today. We'll fold it up and place into the pillowcase for gifting on June 23 up in Vermont.
Monday, June 11, 2018
Tutorial on connecting my dresdens.....
Just took pictures and documented how I did my quilt as you go.... you know, so I can remember when I add the next round in a few days!
I started with brown and pink. I used the same backing fabric as the pink block (middle one) so it would blend better on the back. I cut two strips 1.5x16.25 inches- one for each side. I put the first one right side up on the cutting mat and placed the brown dresden on top of it. This will be the connector on the back.
Pin so that the strip won't move in the next steps. I like the 1.5 width better than the 1 inch as it gives me more wiggle room for getting it over the sewn part.
Next - pull back the backing and batting 1/4 of an inch or more from the second dresden. I tried to not quilt into the seam allowance when doing that part. Then place right sides together of the dresdens on top of each other, pin and sew 1/4 seam allowance. Yes, I did the whole of the first block (top, batting and backing) unlike other tutorials. I am thinking the 'bump' won't be that noticeable and if it is... I can always trim with scissors!
spread it out and you get this on the back.
I use my herra marker and a ruler to mark a 1/4 inch from the edge.
That marked line.... you can either press or being me and too lazy, I just used the herra marker to 'press' it down so it is a finished edge.
Now fold it over to cover that opening... pull the two apart a bit to snuggle the extra and trim if needed. I kept the little bump and think it won't bother me at all once washed and in use. I used thin hand quilting batting so it should work.
All set for hand stitching that seam with a blind stitch - or however you stitch your binding... which I get to do in car line wait today.
This is what the front looks like - see - you can't even tell it was done as a quilt as you go! I love how this makes things an easier size for me to hand or machine quilt. I don't mind this process.... much better than tugging a huge quilt through my small machine or lugging a big quilt around for quilting.
Yesterday I went over to a friends house and met up with a few friends and we tried a pinterest project. We figured we get a 'fail' but wold have fun anyway. Turns out they all came out pretty good!
This is the photo we used as a guide. A big thanks to her hubby John who tore apart a pallet and sanded 5 boards - one for each of us.
This is mine outside my front door!
Subscribe to:
Posts (Atom)